Gallery:Shin Megami Tensei V: Vengeance: Difference between revisions
m (→United States) |
Ruinedstego (talk | contribs) m (→Demon Renders) |
||
| (49 intermediate revisions by 8 users not shown) | |||
| Line 1: | Line 1: | ||
{{DISPLAYTITLE:Gallery:''Shin Megami Tensei V: Vengeance''}} | {{DISPLAYTITLE:Gallery:''Shin Megami Tensei V: Vengeance''}}{{New Release}} | ||
{{ | |||
This is a gallery of artwork, graphics, and screenshots from {{Link|Game|smt5v}}. | This is a gallery of artwork, graphics, and screenshots from {{Link|Game|smt5v}}. | ||
| Line 31: | Line 30: | ||
<gallery> | <gallery> | ||
SMT5V Nahobino Artwork.png|[[Nahobino]] Artwork | SMT5V Nahobino Artwork.png|[[Nahobino]] Artwork | ||
SMT5V Nahobino New Form Artwork.png|Nahobino's New Form Artwork | |||
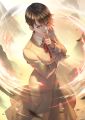
SMT5V Yoko Hiromine Artwork.png|[[Yoko Hiromine]] Artwork | SMT5V Yoko Hiromine Artwork.png|[[Yoko Hiromine]] Artwork | ||
</gallery> | </gallery> | ||
| Line 36: | Line 36: | ||
===Demon Artwork=== | ===Demon Artwork=== | ||
<gallery> | <gallery> | ||
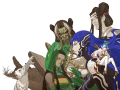
SMT5V Qadištu Artwork.png|Artwork of [[Qadištu]] Demons | SMT5V Qadištu Artwork.png|Artwork of [[Qadištu]] Demons | ||
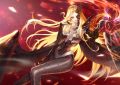
SMT5V Lilith Artwork.png|[[Lilith]] Artwork | SMT5V Lilith Artwork.png|[[Lilith]] Artwork | ||
SMT5V Eisheth Zenunim Artwork.png|[[Eisheth Zenunim]] Artwork | |||
SMT5V Agrat bat Mahlat Artwork.png|[[Agrat bat Mahlat]] Artwork | |||
SMT5V Naamah Artwork.png|[[Naamah]] Artwork | |||
SMT5V Glasya-Labolas Artwork.png|[[Glasya-Labolas]] Artwork | |||
SMT5V Konohana Sakuya Artwork.png|[[Konohana Sakuya]] Artwork | |||
SMT5V Nahobeeho Artwork.png|[[Nahobeeho]] Artwork | |||
SMT5V Amabie Artwork.png|[[Amabie]] Artwork | |||
SMT5V Nyami Nyami Artwork.png|[[Nyami Nyami]] Artwork | |||
SMT5V Anansi Artwork.png|[[Anansi]] Artwork | |||
SMT5V Onyankopon Artwork.png|[[Onyankopon]] Artwork | |||
</gallery> | |||
===Demon Renders=== | |||
<gallery> | |||
SMT5V Demons Render.png|A variety of Demons | |||
SMT5V Cherub Render.png|[[Cherub]] Render | |||
SMT5 Cu Chulainn Render.png|[[Cu Chulainn]] Render | |||
SMT5V Dis Render.png|[[Dis]] Render | SMT5V Dis Render.png|[[Dis]] Render | ||
SMT5V Gremlin Render.png|[[Gremlin]] Render | |||
SMT5V Glasya-Labolas Render.png|[[Glasya-Labolas]] Render | SMT5V Glasya-Labolas Render.png|[[Glasya-Labolas]] Render | ||
SMT5V Halphas Render.png|[[Halphas]] Render | SMT5V Halphas Render.png|[[Halphas]] Render | ||
SMT5 Idun Render.png|[[Idun]] Render | SMT5 Idun Render.png|[[Idun]] Render | ||
SMT5V Kinmamon Render.png|[[Kinmamon]] Render | SMT5V Kinmamon Render.png|[[Kinmamon]] Render | ||
SMT5V Konohana Sakuya Render.png|[[Konohana Sakuya]] Render | SMT5V Konohana Sakuya Render.png|[[Konohana Sakuya]] Render | ||
SMT5V Kresnik Render.png|[[Kresnik]] Render | |||
SMT5V Kudlak Render.png|[[Kudlak]] Render | SMT5V Kudlak Render.png|[[Kudlak]] Render | ||
SMT5 Loup-garou Render.png|[[Loup-garou]] Render | SMT5 Loup-garou Render.png|[[Loup-garou]] Render | ||
SMT5V Mastema Render.png|[[Mastema]] Render | |||
SMT5 Mothman Render.png|[[Mothman]] Render | |||
SMT5 Muu Shuwuu Render.png|[[Muu Shuwuu]] Render | SMT5 Muu Shuwuu Render.png|[[Muu Shuwuu]] Render | ||
SMT5V Nahobeeho Render.png|[[Nahobeeho]] Render | |||
SMT5V | |||
SMT5V Peallaidh Render.png|[[Peallaidh]] Render | SMT5V Peallaidh Render.png|[[Peallaidh]] Render | ||
SMT5 Pixie Render.png|[[Pixie]] Render | SMT5 Pixie Render.png|[[Pixie]] Render | ||
SMT5V Saturnus Render.png|[[Saturnus]] Render | |||
SMT5V Turbo Granny Render.png|[[Turbo Granny]] Render | SMT5V Turbo Granny Render.png|[[Turbo Granny]] Render | ||
SMT5V Vouivre Render.png|[[Vouivre]] Render | SMT5V Vouivre Render.png|[[Vouivre]] Render | ||
SMT5V Xiezhai Render.png|[[Xiezhai]] Render | |||
SMT5 Yoshitsune Render.png|[[Yoshitsune]] Render | SMT5 Yoshitsune Render.png|[[Yoshitsune]] Render | ||
</gallery> | </gallery> | ||
| Line 66: | Line 84: | ||
SMT5V Black Logo US.png|English logo (black variant) | SMT5V Black Logo US.png|English logo (black variant) | ||
SMT5V_Logo_JP.png|Japanese logo | SMT5V_Logo_JP.png|Japanese logo | ||
</gallery> | |||
===Promotional Artwork=== | |||
<gallery> | |||
SMT5V Famitsu Promotional Artwork.png|Famitsu Promotional Artwork | |||
SMT5V Yoko Promotional Artwork.jpg | |||
SMT5V Naamah Promotional Artwork.jpg | |||
</gallery> | </gallery> | ||
==Screenshots== | ==Screenshots== | ||
<gallery> | <gallery> | ||
SMT5V Beelzebub Screenshot.jpg | SMT5V Inflaming Divinity Screenshot.png|Nahobino using [[Inflaming Divinity]] | ||
SMT5V Demon-Haunts Aogami Protagonist Screenshot.jpg|[[Aogami]] talking with the protagonist in a demon-haunt | |||
SMT5V Nahobino Aramasa Screenshot.jpg|Nahobino using [[Aramasa]] | |||
SMT5V New Form Nahobino Screenshot.jpg|Nahobino transforming into his New Form | |||
SMT5V New-Form Nahobino Inspecting Screenshot.jpg|Nahobino inspecting his New Form | |||
SMT5V Lunar Hurricane Screenshot.jpeg|Nahobino using [[Lunar Hurricane]] | |||
SMT5V Paraselene Blur Screenshot.jpg|Nahobino using [[Paraselene Blur]] | |||
SMT5V New Form Nahobino Battle Ready Screenshot.jpg|New Form Nahobino ready for battle | |||
SMT5V Mastema Descending Screenshot.jpg|[[Mastema]] descending into Da'at | |||
SMT5V Mastema Screenshot.jpg|Mastema appearing | |||
SMT5V Battle with Glasya-Labolas Screenshot.jpg|[[Glasya-Labolas]] ambushing the protagonist and [[Yuzuru Atsuta]] | |||
SMT5V Yoko Hiromine Introduction Screenshot.jpg|[[Yoko Hiromine]] introducing herself | |||
SMT5V Yoko Hiromine Announce 1 Screenshot.jpg|Yoko at [[Jouin High School]] | |||
SMT5V Yoko Close Up Screenshot.jpg| | |||
SMT5V Yoko Hiromine Announce 2 Screenshot.jpg|Yoko on the roof of the Jouin dormitory building | |||
SMT5V Sacrifice of Clay Screenshot.jpg|[[Nuwa]] using [[Sacrifice of Clay]] | |||
SMT5V Nuwa and Yakumo Introduction Screenshot.jpg|[[Nuwa]] and [[Shohei Yakumo]] introduction | |||
SMT5V Guardian Angels Screenshot.jpg|[[Angel]] and [[Archangel]] using [[Guardian Angels]] | |||
SMT5V Abdiel Threatening Screenshot.jpg|[[Abdiel]] Threatening | |||
SMT5V Naamah Nahobino Yoko Screenshot.jpg|[[Naamah]] introduction | |||
SMT5V Naamah Introduction Screenshot.jpg | |||
SMT5V Naamah using Mamudo Screenshot.jpg|[[Naamah]] casting [[Mamudo]] | |||
SMT5V Naamah Murder Screenshot.jpg|[[Naamah]] attacking humans | |||
SMT5V Naamah Glasya-Labolas Attack Screenshot.jpg|[[Glasya-Labolas]] and Naamah attacking humans | |||
SMT5V Protagonist Transforming Screenshot.jpg|The protagonist transforming into his Nahobino form | |||
SMT5V Lilith Harvesting Magatsuhi Screenshot.jpg| | |||
SMT5V Lilith Screenshot.jpg|[[Lilith]] | |||
SMT5V Sakanagi Screenshot.jpg|Nahobino using [[Sakanagi]] | |||
SMT5V Nahobino Tao Yoko Shinagawa Screenshot.jpg|Nahobino with Tao and Yoko | |||
SMT5V Agrat Bat Mahlat Screenshot.jpg|[[Agrat Bat Mahlat]] sitting | |||
SMT5V Eisheth Zenunim Screenshot.jpg|[[Eisheth Zenunim]] | |||
SMT5V Eisheth Zenunim Holding Miyazu Atsuta Hostage Screenshot.jpg|Eisheth Zenunim holding [[Miyazu Atsuta]] hostage | |||
SMT5V Eisheth Zenunim Threatening Miyazu Atsuta Screenshot.jpg | |||
SMT5V Nahobino Dialog Branch Screenshot.jpg|Dialog branch | |||
SMT5V Eisheth Dialog Screenshot.jpg| | |||
SMT5V Agrat bat Mahlat Shinjuku Screenshot.jpg | |||
SMT5V Queen's Decree Screenshot.jpg|Agrat Bat Mahlat casting [[Queen's Decree]] | |||
SMT5V Qadištu Assembled Screenshot.jpg|The [[Qadištu]] Assembled | |||
SMT5V Nahobino Tao Yoko confronting the Qadištu Screenshot.jpg|Confronting the Qadištu | |||
SMT5V Mother Earth Screenshot.jpg|Lilith casting [[Mother Earth]] | |||
SMT5V Qadištu Entropy Screenshot.jpg|The Qadištu using [[Qadištu Entropy]] | |||
SMT5V Agrat bat Mahlat Incantation Screenshot.jpg| | |||
SMT5V Shakan Screenshot.jpg|Nahobino in [[Shakan]] | |||
SMT5V Shakan Cherub Screenshot.jpg|Nahobino encountering two [[Cherub]] in [[Shakan]] | |||
SMT5V Shakan Promotion Screenshot.jpg|Nahobino exploring Shakan | |||
SMT5V Shakan Exploration Screenshot.jpg|Promotional image of Nahobino in Shakan | |||
SMT5V Beelzebub Screenshot.jpg|[[Beelzebub]] | |||
SMT5V Khonsu Screenshot.jpg|[[Khonsu]] | |||
SMT5V Khonsu Battle Screenshot.jpg|Confronting Khonsu | |||
SMT5V Da'at Shinjuku Screenshot.jpg|[[Da'at]] [[Shinjuku]] | |||
SMT5V Tao casting Mahamaon Screenshot.jpg|[[Tao Isonokami]] casting [[Mahamaon]] | |||
SMT5V Essence Fusion Screenshot.jpg|Screenshot of new essence fusion | |||
SMT5V Miracles Screenshot.jpg|Selecting miracles | |||
SMT5V Estoma Promotional Screenshot.jpg|New [[Estoma]] skill | |||
SMT5V What Comes After Four Screenshot.jpg|[[Anansi]] casting [[What Comes After Four]] | |||
SMT5V Onyankopon Screenshot.jpg|[[Onyankopon]] in Da'at | |||
SMT5V Nyami Nyami Screenshot.jpg|[[Nyami Nyami]] fusion | |||
SMT5V Masakado Nahobino Screenshot.jpg|[[Masakado]] meeting the Nahobino | |||
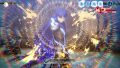
SMT5V Masakado Recalcitrant Execution Screenshot.png|Masakado using [[Recalcitrant Execution]] | |||
SMT5V Recalcitrant Execution Screenshot.jpg|[[Recalcitrant Execution]] | |||
SMT5V Demi-fiend Close Up Screenshot.jpg|Close up of the [[Demi-fiend]] | |||
SMT5V Return of the True Demon Demi-fiend Screenshot.jpg|The [[Demi-fiend]] and [[Pixie]] in the Hall of Chaos | |||
SMT5V Demi-fiend Recruitment Screenshot.jpg|Recruiting the [[Demi-fiend]] as a guest party member | |||
SMT5V Demi-fiend Demon Haunt Screenshot.jpg|Demi-fiend as a guest party member in a demon-haunt | |||
SMT5V Demi-fiend Big Bang Screenshot.jpg|Demi-fiend casting Big Bang | |||
SMT5V Guest Demi-fiend Screenshot.jpg|Demi-fiend as a guest party member. | |||
SMT5V Guest Demi-fiend Freikugel Screenshot.jpg|Demi-fiend as a guest party member casting [[Freikugel]] | |||
SMT5V Dagda Screenshot.jpg|Nahobino meeting [[Dagda]] | |||
SMT5V Lost Hit Screenshot.jpg|Dagda using [[Lost Hit]] | |||
SMT5V Konohana Sakuya Screenshot.jpg|[[Konohana Sakuya]] introducing herself | |||
SMT5V Sakuya Sakura Screentshot.jpg|Konohana Sakuya casting [[Sakuya Sakura]] | |||
</gallery> | |||
==Promotions== | |||
===Japan=== | |||
<gallery> | |||
SMTVV Famitsu DX Pack Tapestry Promo.jpg | Famitsu DX Pack Tapestry | |||
SMTVV Famitsu DX Pack Pillow Promo.jpg | Famitsu DX Pack Pillow | |||
SMTVV Famitsu DX Pack Mug Promo.jpg | Famitsu DX Pack Mug | |||
SMTVV Famitsu DX Pack Mitama Promo.jpg | Famitsu DX Pack Linking Keychains | |||
SMT5V Red Tokyo Tower Collab Promo.jpg | Red Tokyo Tower collab | |||
</gallery> | </gallery> | ||
| Line 86: | Line 192: | ||
|url=1bqvAQUl1HQ | |url=1bqvAQUl1HQ | ||
|caption=Spotlight Livestream | |caption=Spotlight Livestream | ||
}} | |||
{{Video | |||
|url=QbLdn_bviZI | |||
|caption=The Sacrifice Trailer | |||
}} | |||
{{Video | |||
|url=Se_Pv934ljU?si | |||
|caption=New Storyline: Canon of Vengeance | |||
}} | |||
{{Video | |||
|url=4tiHggWkGRc | |||
|caption=An Ideal World | |||
}} | |||
{{Video | |||
|url=bGpbTXCVkwQ | |||
|caption=Complete Guide | |||
}} | |||
{{Video | |||
|url=Rsu-SYE-Vxc | |||
|caption=New Locations | |||
}} | |||
{{Video | |||
|url=JHi08zH_EF4 | |||
|caption=The Ultimate Beginning | |||
}} | |||
{{Video | |||
|url=esJS9uV4qYM | |||
|caption=Launch Trailer | |||
}} | |||
{{Video | |||
|url=wYESUNu2bc0 | |||
|caption=Opening Movie | |||
}} | }} | ||
{{Clear}} | {{Clear}} | ||
| Line 91: | Line 229: | ||
===Japanese=== | ===Japanese=== | ||
{{Video | {{Video | ||
|url= | |url=DSmRq6DIazE | ||
|caption=PV01 | |caption=PV01 | ||
}} | }} | ||
{{Video | {{Video | ||
|url= | |url=XtjpUNHoufs | ||
|caption=PV01 (Long Ver.) | |caption=PV01 (Long Ver.) | ||
}} | }} | ||
{{Video | {{Video | ||
|url= | |url=osEDRzx1XoU | ||
|caption=Spotlight Livestream | |caption=Spotlight Livestream | ||
}} | |||
{{Video | |||
|url=TZaGO8Os_fw | |||
|caption=PV02 | |||
}} | |||
{{Video | |||
|url=la89Q578HbI | |||
|caption=Introduction to Battle Skills | |||
}} | |||
{{Video | |||
|url=CtUh8hLYDmY | |||
|caption=Complete Guide | |||
}} | |||
{{Video | |||
|url=RY1Xqbt0apU | |||
|caption=Demo Impressions | |||
}} | |||
{{Video | |||
|url=3NSNxLZdjuA | |||
|caption=PV03 | |||
}} | |||
{{Video | |||
|url=8xzTWnOj9iE | |||
|caption=Title Movie | |||
}} | }} | ||
{{Clear}} | {{Clear}} | ||
Latest revision as of 21:49, 14 June 2024
| This article is about or related to newly released media. | |
| Information within may be sparse and may dramatically change as more information becomes available. |
This is a gallery of artwork, graphics, and screenshots from Shin Megami Tensei V: Vengeance.
Covers
United States
-

Nintendo Switch
-

PlayStation 5
-
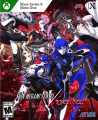
Xbox One/Xbox Series X


United Kingdom
-

Nintendo Switch
-

PlayStation 5
-

Xbox One/Xbox Series X
-

Steelbook cover


Artwork
Illustrations
-

Key artwork with shadow border.
-

Key artwork with logo.
-

Key artwork 16:9 variant.
-
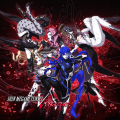
Key artwork square variant.


Character Art
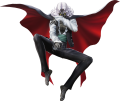
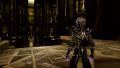
-

Nahobino Artwork
-

Nahobino's New Form Artwork
-

Yoko Hiromine Artwork


Demon Artwork
-

Artwork of Qadištu Demons
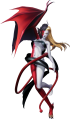
-

Lilith Artwork
-

Eisheth Zenunim Artwork
-

Agrat bat Mahlat Artwork
-

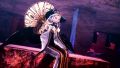
Naamah Artwork
-

Glasya-Labolas Artwork
-

Konohana Sakuya Artwork
-

Nahobeeho Artwork
-

Amabie Artwork
-

Nyami Nyami Artwork
-

Anansi Artwork
-

Onyankopon Artwork


Demon Renders
-

A variety of Demons
-
Cherub Render
-
Cu Chulainn Render
-

Dis Render
-

Gremlin Render
-

Glasya-Labolas Render
-

Halphas Render
-

Idun Render
-

Kinmamon Render
-

Konohana Sakuya Render
-

Kresnik Render
-
Kudlak Render
-

Loup-garou Render
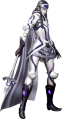
-

Mastema Render
-

Mothman Render
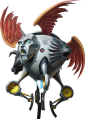
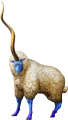
-

Muu Shuwuu Render
-

Nahobeeho Render
-

Peallaidh Render
-

Pixie Render
-

Saturnus Render
-

Turbo Granny Render
-
Vouivre Render
-
Xiezhai Render
-
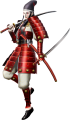
Yoshitsune Render


Logos
-

English logo
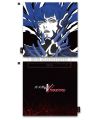
-

English logo (black variant)
-

Japanese logo
Promotional Artwork
-
Famitsu Promotional Artwork
-
-


Screenshots
-
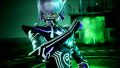
Nahobino using Inflaming Divinity
-

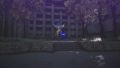
Aogami talking with the protagonist in a demon-haunt
-

Nahobino using Aramasa
-

Nahobino transforming into his New Form
-
Nahobino inspecting his New Form
-

Nahobino using Lunar Hurricane
-

Nahobino using Paraselene Blur
-

New Form Nahobino ready for battle
-
Mastema descending into Da'at
-

Mastema appearing
-

Glasya-Labolas ambushing the protagonist and Yuzuru Atsuta
-

Yoko Hiromine introducing herself
-

Yoko at Jouin High School
-

-

Yoko on the roof of the Jouin dormitory building
-

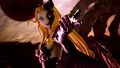
Nuwa using Sacrifice of Clay
-

Nuwa and Shohei Yakumo introduction
-

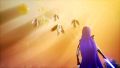
Angel and Archangel using Guardian Angels
-
Abdiel Threatening
-
Naamah introduction
-
-
-
Naamah attacking humans
-
Glasya-Labolas and Naamah attacking humans
-

The protagonist transforming into his Nahobino form
-

-

-

Nahobino using Sakanagi
-

Nahobino with Tao and Yoko
-
Agrat Bat Mahlat sitting
-

-

Eisheth Zenunim holding Miyazu Atsuta hostage
-

-

Dialog branch
-

-

-

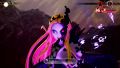
Agrat Bat Mahlat casting Queen's Decree
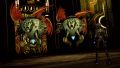
-

The Qadištu Assembled
-

Confronting the Qadištu
-

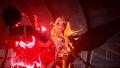
Lilith casting Mother Earth
-
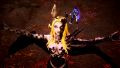
The Qadištu using Qadištu Entropy
-

-
Nahobino in Shakan
-
-

Nahobino exploring Shakan
-

Promotional image of Nahobino in Shakan
-

-

-

Confronting Khonsu
-

-

Tao Isonokami casting Mahamaon
-

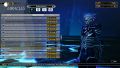
Screenshot of new essence fusion
-
Selecting miracles
-

New Estoma skill
-

Anansi casting What Comes After Four
-

Onyankopon in Da'at
-

Nyami Nyami fusion
-
Masakado meeting the Nahobino
-

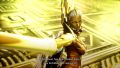
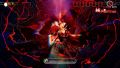
Masakado using Recalcitrant Execution
-

-

Close up of the Demi-fiend
-

The Demi-fiend and Pixie in the Hall of Chaos
-

Recruiting the Demi-fiend as a guest party member
-

Demi-fiend as a guest party member in a demon-haunt
-

Demi-fiend casting Big Bang
-

Demi-fiend as a guest party member.
-

Demi-fiend as a guest party member casting Freikugel
-

Nahobino meeting Dagda
-

Dagda using Lost Hit
-

Konohana Sakuya introducing herself
-

Konohana Sakuya casting Sakuya Sakura


Promotions
Japan
-

Famitsu DX Pack Tapestry
-
Famitsu DX Pack Pillow
-

Famitsu DX Pack Mug
-

Famitsu DX Pack Linking Keychains
-
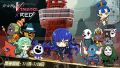
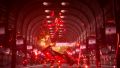
Red Tokyo Tower collab


